Tuesday, December 19, 2017

Final Reflection

Emotion Project:

In this project, I was assigned the emotion disgust. The project goal was to animate a pre-rigged model named Max. In order to execute this project, I needed to understand the body movements and reactions that were associated with someone who is disgusted by something. This was a fairly easy research process that turned into a challenging project process. The easier parts were making the different joints and facial expressions move when and how I needed them to. However, getting these to move in tandem with the other parts was a greater challenge.  It took me a few tries to get all the moving parts to match up properly and actually simulate the expression of disgust, but when I did get it to work, it was well worth it. I really did enjoy doing this project and I hope that at some point we can revisit this project and do more with it or even try out other emotions that we want to do. There is a change that I would like to make and that would be to include some sort of object that is the reason for Max to be disgusted, as it would provide greater context for the scene being shown. Overall I really did enjoy this project, and I felt like I learned a great deal from it. 

Personal Project:

For this project. we had to come up with an elevator pitch about a project that personally interested us. Before presenting, we had to research the project and find at least one example of our project that could be used as an example. For my project, I wanted to 3-D model a set of floating islands and then create a world around it. This seemed very doable at first, and I even had some new methods I was wanting to use that would allow for easier modeling and more creativity to be expressed. I was very excited to get started on this project as I had a very grand vision for what I could turn this project into. The creation of the islands themselves was a relatively easy task and I thought that the project would've been a breeze from here on out. However, when it came to adding effects and some more environmental items, I hit a new wall of difficulty. The effects that I wanted to use such as fire and the growing of vines, didn't work out as well as I had hoped. The fire effect, a preset given in Maya's FX tab seemed like a given to use, as all the tutorials I watched had used it too. For whatever reason, it didn't work with my project and I ended up scrapping the fire idea until I could figure out how to do it. The answer came in a very challenging way. I ended up having to use a liquid emitter (think of a spout spraying water into the air) and then I had to change the visual effect from being water to being flames that transitioned into smoke. This was a tough but rewarding process, as I am very happy with the results. The vines however, did not work out so well. I originally planned on using an extension made using Python that would procedurally generate vines around the islands. Sadly I couldn't figure out how to get the program to actually run in Maya and I had to scrap that idea. My teacher however, had another idea, and that was to hand create curvy vines using the EP Curve tool and wrapping a cylinder around it to create a vine-like object. This worked at first, but upon actually playing the animation out using the new vine, Maya would crash therefore negating that idea as well. I decided to move on despite this and continued to work on the rest of the project. I am already planning a return to this project with several changes in mind on how to improve it and make it fit the idea that I originally had. Overall the project was a great learning experience and I really enjoyed working on it.

Rotoscope Project:

For my rotoscope project, I was tasked with filming a video and then drawing over it to create a rotoscope video. This project was very difficult for me as drawing is not my strongest skill, especially on a computer. However, despite the lack of drawing ability I really enjoyed this project. I really felt like I gained a much greater understanding on how 2-D animations work and how much work goes into making one. I definitely think that if I was able to spend more out of class time on the project it would've gone much smoother and looked much better for the final result. I would like to go back and draw over the animation to add color and hence style to the project, but for what I had completed I am very happy with the results.

Tuesday, October 17, 2017

Independent Project Overview

 For my project I am working on a series of floating islands and methods of which one could go from one to the other (mainly through means of teleportation). Anyways the islands are being created using the sculpting tools on basic polygon shapes in order to mold them like clay in order to create their island like characteristics. I gained this inspiration from a YouTube channel called 3D Artcore as he made his own floating island with a very well designed mansion and electricity system. Here are some pictures of his work:


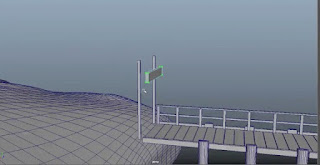
For my islands I wanted to something a little more simple yet more expansive just to see how everything would turn out in the environment and make changes where I see them to be fit. I'm not sure on where I might possibly take this project as I might just model it and learn from the experience, but we'll see how things turn out. Oh I almost forgot to show some of the work I have started already! Here ya go:


Tuesday, April 4, 2017

Professional Project Review

This is a project for a design for a company called Fractal Design and one of their new products. The animation showcases the ins and outs of the computer and focuses on specific parts of the product. The 3D design was very well done and looks incredibly smooth and sleek looking and the model accurately shows off the specifics of the computer. The figurative "story" of this animation is how sleek and incredibly powerful this computer is and all of the parts that go into it taking it into the "next-level" of computer technology. The way the animator made smooth transitions and crafted each piece with incredulous attention to detail make for an amazing product reveal and entices the viewer to want to know more. These key elements are something that I hope to include in my own work along with my own knowledge of camera arcs to hopefully replicate this process and to create a piece that even comes close to this type of animation. I feel as though the animator did a very well job of showcasing the product and does it in such a way that it blows away the competition and beats out the animation of even some businesses and their designs that are done by a team of animators. Despite this, I believe the animator made a very poor choice in the text in terms of color and placement that didn't make it really stand out and was often in places that just didn't attract attention.

Source: https://www.behance.net/gallery/50608963/Fractal-Design

Wednesday, March 22, 2017

The Plausible Impossible

This scene shows Donald Duck meeting his cousin Gus Goose. Gus greets Donald with a handshake that is seemingly impossible. For one, geese and ducks don't have the same hand bones as humans do so a "finger clasping" handshake should be impossible for the two relatives. The second impossibility is the fact that Gus makes Donald squash down and spring up again. Handshakes are a human like trait that when applied to humanoid like creatures, such as the human like Donald Duck, we as viewers believe that that is a-ok and nothing is off about. While the handshakes we receive often feel as though the other party is trying to throw you around with a shake, we know that this is highly unlikely to happen in a standard handshake.


The next scene shows Gus beginning his very extravagant meal by literally inhaling a bowl of soup. Gus does not eat soup how soup is even considered to be eaten. Gus is using two spoons to literally shovel soup into his mouth in gigantic quantities and appears to be spilling quite a bit despite there being no evidence of liquids on the table or on himself. This is impossible because liquid cannot be "shoveled" in such a manner that it flings itself into a persons mouth and they are able to eat it at that speed. This is plausible however as the term "shoveling down food" is often used to describe someone who can consume large quantities of food at an extremely fast rate.


The Next scene I chose was the one in which Gus goes to sit down to begin his feast at Donald's dinner table. Gus gains a massive amount of momentum and jumps into the chair which causes it to act like a spring thats just been flicked and it reverberates back in forth drastically. This is impossible because chairs do not have that level of springiness to them that would allow them to do that. On the other hand if you do run at a chair full speed or even just run at a chair it will get knocked backwards and possibly even fall down due to momentum of your body hitting the chair.


The next scene was Gus making a sock out of spaghetti noodles using knitting needles. This is impossible as noodles are not very structurally stable and are very fragile. However, in theory this could work if the noodles were tough enough and the person knitting was an expert knitter and could create a sock with ease.


The final scene is one in which Gus is making a sandwich by folding the ingredients like a deck of cards and shuffling the ingredients together to form a gigantic stacked sandwich. This is impossible because there is no way to shuffle the lunch meats and cheeses into stacked slices of bread and effectively make a sandwich. This could be possible if you went slowly layer by layer stacking the ingredients in a card like manner and made a giant sandwich out of it.


Tuesday, February 7, 2017

S.P.Ooky Final

This was a stop motion project that was set to a horror/scary movie theme. The goal of the project was to create a horror villain that was to chase a group of teenagers. This was a kind of play on a horror movie cliche with a teleporting villain and a group of "dumb teenagers" involved. We wanted to create a sense of urgency and to escape the villain. Overall the project turned out very well being our first stop-motion animation film.

Tuesday, December 20, 2016

Professional Project Review

League of Legends 2016 Mis-Season Invitational 

This was an animation for a tournament for League of Legends that happened earlier this year. It showcased the mascots representing each region that was participating in the tournament. This was all 3-d animation and the creators used a smoke-effect around objects that were 3-d modeled and animated. They also had glow affects to symbolize certain aspects about each mascot like the eyes of the Wolves or the crown on the Angel. The story of this was to announce the teams from each region that would be competing in the tournament. I would definitely try to apply the smoke affect to animations that I might create in the future, especially when applying it to an already existing 3-d modeled object and animation. I have already learned how to 3-d animate objects and living things so adding a smoke affect to anything wouldn't be that much of a problem. The creators did a very well job of introducing each team and the mascots representing them. The introduction of each mascot was also very well done as it flowed incredibly smoothly and moved right into each scene as it comes about. The one thing I recommend is for the narration that is supposed to be there is very distorted and not very loud so it was hard to understand what the announcer's voices commentating in the background. Overall this is a very good animation and is put together with major attention to detail and a strong sense of excitement is built for any fan of the game and teams that play professionally.

Link: https://www.behance.net/gallery/36592183/LEAGUE-OF-LEGENDS-2016-MID-SEASON-INVITATIONAL


Monday, December 19, 2016

Professional Article

The Future of Animation Is... A Look into Industry Professional's Animated Crystal Balls


This article is an article about the future of many different fields of animation from several lead designers in their fields and their opinions on the future of animation. The author's and their comments help to provide insight into what the future of the animation field could look like. Many animators state that the industry has never been more booming and increasingly more and more demanding every day. With the success of animated movies that continue to roll out, Arthur Kautz states that, "animated movies have outperformed all other genres of film at the domestic and worldwide box office." This goes to show that animated movies is going to be an increasingly high demand field in the future for anyone interested in starting somewhere. Another point brought across by several animators is that animation is headed off into the realm of mobile devices. These authors state that with many app development kits being able to run off of PC and Mac operating systems, it allows more creative and innovative animations to come to life. One example is a game called The Little Fox. The Little Fox is a polygonal platform adventure game produced by Oleg Batrakov. This is the first highly successful game in this style of animation and hundreds of other developers have hoped on that train and started producing their own games in that polygonal style. Personally I feel that these animators all make valid points on where animation is going in the future. As someone who frequently watches and plays a variety of movies and games, I have a wide spectrum of animation styles to make my own biases on. I agree that animation will more than definitely start to have a bigger role in the mobile word, and not just when it comes to games. The proof lies in apps and switchboards that allow you to customize the animations on your phone and even on your computers as well, which according to many of these animators, will become a very prosperous industry in the near future.

http://www.animationcareerreview.com/articles/future-animation-look-industry-professionals-animated-crystal-balls 

Technical Tutorial

The skill that I will be teaching today is how to create a shatter effect on any flat surface in Maya. You start off by selecting the surface you want to shatter using the face select tool.


 Then go to edit mesh and mouse over to the small white square next to the tab "Add Divisions." A window should pop up with setting changes for adding divisions, and to start make the division levels 1 and mode on triangles (Note: This can be changed to quads if you want to start with that instead of triangles). After making sure that is all selected properly go ahead and click on apply.


Your surface should now have a pattern made with lines on it, this is how you know it worked. After making that first set of divisions, go ahead and click apply once more to add another layer of-


divisions using either the quads or triangles setting, in this example I used the quads. After your second divisions are added go ahead and add your third and final division to the wall using your method of choice. After that start selecting faces in the divisions, roughly half of your faces should be used, but that's all up to personal preference. After selected your desired number of faces click on the extrude button and proceed to push the faces into the wall creating indents where the faces are. After pushing these back into the wall start selecting other faces that aren't indented, roughly the same number as the other set. After selecting these faces select the extrude tool once again, and begin to pull these faces out from the wall just slightly, created a staggered look across the wall. Now to make the wall look even more shattered, go into vertices mode and select the centermost point on your wall. Then, turn on soft select mode by pressing the (B) key, (B key is defaulted for soft-select), after that the lines should get a yellow glow around them to signify that soft-select is on. Once it is on, push the centermost point in towards the wall to create a warped wall effect as if and object had struck it. After that your wall should be completely done, so at this point feel free to add any textures you want, or even go through it again and change up the type of divisions you want to have in it.

Tuesday, November 29, 2016

Fall Project Final

My project was to create a functioning podracer of my own design and a track for it to move on. Adding extra lighting and special effects was something I wanted to do in order to add that extra step into making the project more personal. I had this idea mainly from a Nintendo 64 game called StarWars Podracer that I played as a kid. My process started with research on what certain podracers looked like and how they moved on a track with all the lighting and particle effects.

 I started by drawing inspiration from a few different podracers and then mixing it with my own creativity of produce the racer. The podracer itself took a bit of time to make because the shell of the cockpit required incredible detail in order to move the polygons to form that shell-like appearance of the cockpit. The electricity for the energy beam was something that I thought would be the hardest thing to make but it turns out that it was quite simple and fun to make. The environment that my podracer is placed in was something that I created from base concepts of Yavin IV and Naboo from the Star Wars universe and I thoroughly enjoyed creating the shatter effects on the walls. The Temple and pillars that I created were something that I had enjoyed seeing on Yavin IV and took that idea into my own creation, turning all the pillars and bricks from the original planet and turned it into Jade.


Coming into the project I had no idea how to make a shattered wall or even the glow effects on the energy beam on the podracer. Other than those two things, there wasn't anything new that I have learned when making this project. I would definitely try and make more podracers to race around the track in the future to add more diversity to the environment and to the animation as a whole. However, that was the only thing that I would really change besides making the animation just a little less choppy. I can see myself using some of these techniques, especially the shatter, in my future projects.

Monday, October 17, 2016

Fall Animation Project

For my project this fall I wanted to design something from my childhood reimagined in my own way. My project is of my own custom podracer from the Star Wars universe. I have always been fascinated with vehicles of Star Wars and decided to create my own. I drew part of my inspiration from Sebulba's podracer from Episode 1 and then crafted it to fit the design that I had imagined. I also am designing a track for it as well, and the track is something that I created with inspiration from two planets, Naboo and Kashyyyk and my knowledge of ancient structures to create an ancient looking course. I personally love the fracture effect I created on the walls of the track to represent impact markers and just to create an effect of wear and tear on the track. I'm not sure what part to add next, either an environment or animation, however I believe it will turn out well no matter what course I choose.


Podracer front view

Side view. Tiles are different types of metal used in the crafting of the engine


Spiked domes taken from Naboo

Inspiration for the dome, Theed Palace, Naboo.

Thursday, May 19, 2016

End of the year graphics

In this class I'm sure that we were supposed to learn about designing things and how to properly create packages and other things. However I didn't really learn much of anything besides the fact that I will not be doing Graphic Design. I originally was in 3rd hour GD and even in that class there was nothing we actually learned how to do on our own. Our teacher never helped us as her responses to any question was either a response that ended up being even more confusing or she simply said "Don't ask me, use google." You would think that someone with a teaching degree would actually teach the class, but that wasn't the case. The things I did learn were always on my own or through the help of my limited friends in the class. This helped me bond with the other students as our disdain for our teacher brought us together despite our differences. Through the racism, sexism, and favoritism, my friends and I powered forward and turned in all of our assignments that met all the requirements. The only time we never turned something in was when the project was already completed and turned in, and our teacher claims that there was another part to it, which was not discussed when the assignment was made. As such we refused to do it and continued with our work. I have improved in the art of blocking voices out and focusing down on other more important work. When the new GD teacher arrives I hope for the sake of people taking graphic design that he or she is a better teacher than this one. Due to this class alone I wanted to drop Ecomm. but animation and Mr. Netterville made me stay as I loved that class. Overall I am disgusted with this class and honestly wished that I chose a different strand to do something that I actually cared about because half way through the year I basically stopped caring about this class altogether. I was even more mad about the fact that I would actually try on a lot of assignments and she would basically tell me that they were garbage and she wouldn't let me print it off and gave me a worse grade than people who didn't even submit the assignment. Overall I am disappointed with this class and I hope that this gets changed for the future generations that come after myself and my classmates. To that I bid you farewell.

End Of The Year Reflection

  There were many things that I learned in animation. This was the first time I have ever used a true 3D modeling and animation software to create projects and animate them. I learned so much just about Maya in general that it's just too much information to correctly restate and list out. However some of the key things that I learned, not just in Maya, are as follows. First and I think the most important was how to use special FX to edit a video to make it look all snazzy. This was done in our first explosion video and our final for the quarter. The second is how to batch render key frames in Maya and properly transfer them into After Effects to create a well rendered out video, which was done in just about every project. More specifically, the snowflake project had a lot of editing with the colors and gamma so rendering it out took just a little bit longer than expected. Finally I learned how to create a motion path and attach an object to it in order to create movement for that object, which was totally awesome because I was able to make a spaceship fly around and have my coin logo roll down the collection ramp of an arcade machine. This was all acquired through the wonderful instruction of Mr. Netterville and the tutorials he provided for all of his classes. He was always there to support us when we needed help and always had some sort of a tutorial or other resource to give us if we had a question about anything. Netterville helped me out so much with my logo project that honestly, I don't think I could've finished it on my own, and I am so thankful that he devoted so much time to helping me. He is someone who has kept me going in animation and I can't thank him enough for the work he has done. He always has a smile on his face and tries his best to make class enjoyable while focusing down on the work that needs to be done. Animation is something I never thought I would do as it just never occurred to me that I was able to create these things myself, so knowing what I know now, animation holds a special place in my heart and is a pastime I enjoy at home. It's a way to express my own unique outlook on certain projects or to just pour an idea out and have it come to life through maya. That being said, I still have a lot of work to do in order to make my projects more outstanding and unique than they are now and I look forward to the challenge of making them better. I feel as though simply designing and modeling my objects is what I'm best at as I can model something relatively quickly and make it look good, like the grenade I made which according to someone who was actually in the Army, was almost spot on. On the other end of that spectrum, I am pretty bad at making an animation for my object(s) unless it's a simple stationary movement, which is just easy in general. I hope to get better at animating as that is the strand I have selected for next year. This summer I hope to find a summer workshop on how to make my animations better, but as of right now it's still up in the air. I have also been talking with a few potential business partners and I hope to be able to work with them over the summer and create a few projects for them. This is all in part to what I learned in Animation class and I wouldn't want to have it any other way. The only downfall is that projects were often times rushed due to time constraints and when you after school job like I do, it can be very hard to try and squeeze time in to work on those projects after school. Overall I really enjoyed this class. I appreciate all the work Mr. Netterville has done and I appreciate the collaboration and praise of my classmates even more. I love this program and I cannot wait to continue in it through the rest of high school.

Thursday, May 12, 2016

Professional Article Review

The article titled "CAD versus Sketching, Why Ask?" by James Self poses a very interesting view on design. In the article, the author goes around to universities and professional designers to get their opinions and test the different ways himself. After his experiences and research he came to a few conclusions,  one of them is that CAD is a very restricting program and limits what the designer can do based on the limitations of the programs own restrictions. He says that this could crush some designers hopes of making something creative due to not actually being able to 3d model it. The second point he makes is that while CAD can be restrictive, it has a better design structure for measurements and correct boundaries then doing sketches by hand. The third and final claim is that despite CAD and freehand having their own benefits and downfalls, combining the two when designing can be a very useful tool in seeing how exactly a sketch will look upon completion and allows for the digital transfer of files to producers or potential buyers. The author makes very strong claims and his research shows through in almost anything he ever says, which is really nice when comparing something common with something that is not so common like CAD. However, these claims fall short as he only talks about each claim for a brief period without anymore data or conclusions to say about them, which creates the idea that he doesn't really seem to have a real say on what the overall idea of both methods are. Personally as someone who has used CAD and programs similar to it, I find this article to be of a significant importance to me as I like to design things in my free time and have been looking to purchase software to do so. The author definitely knows what he is talking about and I will keep his advice and his research in mind when choosing a design software. Overall I think this is an interesting article that provides good information for anyone who is looking to design using CAD and/or by free handing.
Self, James. "CAD versus Sketching, Why Ask? by James Self." Core77. Core Jr., 2012. Web. 12 May 2016.

Friday, March 11, 2016

Personal Project Blog

In E-Comm we were required to make a container with a label wrapping. I took this a step farther and decided to make a company out of an idea for a coffee mug that I had. I wanted to create a coffee mug with a logo for a company of my own design with a saying on it that accurately describes me. So I started drafting and sketching out some ideas. I eventually settled on two different designs, and with a little help from Mr. Netterville, I was able to create my current logo and brand name, Early Bird Coffee. It was a little difficult to create a coffee mug in Maya, and even more difficult to make the handle. However I learned that when using soft select and adjusting the size and shape that I had 3d revolved, I could easily craft my handle and mug. This required a little outside help from a few of my classmates, but I greatly appreciated the help. I don't think there was anything that I would do different, except maybe try to set up a better scene for my mugs to be displayed in. Honestly, I wouldn't change anything about my process as everything went rather smoothly and moved quickly. My next project is going to be about a moving toy, and I'm sure I'll have to use soft select or maybe even a 3d revolve, so we'll see where it ends up. Overall I am very happy with the way everything turned out and am very proud of my work.


Wednesday, December 16, 2015

Personal Project

Personal Project Review

The scope of this project originally was to create a story about a cat that has a dream that he saves the Royal Cat Gem of his kingdom by growing wings and diving off the cliff that the gem fell down. I later realized that it was going to be a lot harder than I thought to create a cat that could walk on two legs, so I decided to change the character to a worm mainly because I really enjoyed the wiggle worm project. I then thought that the idea of a worm trying to rescue a precious gem was a little to weird for the story so I
decided to create a new species. Enter the Dragonpiller, a half caterpillar half dragon species. Although I changed the story from its original point, the background and landscape I had imagined I kept for my Dragonpiller because they matched the story of the Dragonpiller. However transferring my Photoshop projects to After Effects caused a lot of problems and parts of my project were deleted multiple times, which resulted in me having to cut out some of the extra effects I wanted to originally add. One thing that I still am planning on going back and adding is a spout of fire that the Dragonpiller shoots out to help showcase the whole idea of it being half dragon instead of it just growing wings. One cool thing that I learned along the way is how to create a repeating falling background for one of the scenes in my project. There were a few times that I kind of forgot how to use the puppet pin tool, but luckily my friends were able to help me figure things out again. I would definitely have changed the color scheme of my Dragonpiller next time because the deep purple and bright yellow combination didn't really fit too well for me and I wish that I could've changed it before finishing the animation. I would keep the background, landscape, and the falling background the same because those things really worked well for me.I don't know if we are using After Effects again, but if we are I will remember to never change my Photoshop files once they have already been uploaded to After Effects because that will screw up your entire project. Overall though, I was pretty happy with the way it turned out, but there are definitely some things that I could fix and I hope to have a chance at fixing those in the near future.

Monday, December 14, 2015

Technical Tutorial

So today I am going to teach you how to make a repeating fall background in Adobe After Effects.
1.) First you create your background in Photoshop and set it to the desired dimensions for your project. 
2.) Next you have to import that file into After Effects as editable Photoshop layers.


3.) After that you have to copy and past the image three times in your composition and stack them on top of one another. After that you have to click and drag the spiral icons next to each image layer and then drag them to the layer you want to parent it to.

4.) After linking these layers to a parent function you have to create a node and link the layer that has the other layers attached to it to that node. After that you move the node with keyframes in the desired direction to get the repeating background effect.
If you did everything right, this should be what it looks like.
And there you have it! One repeating background for you.